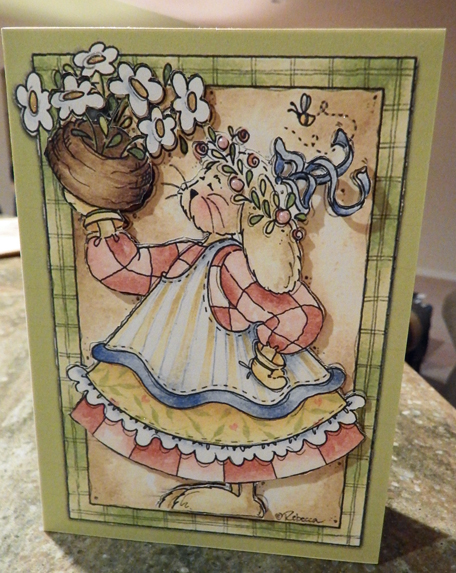
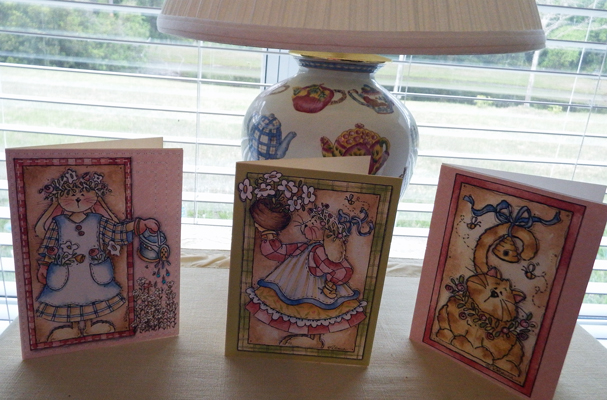
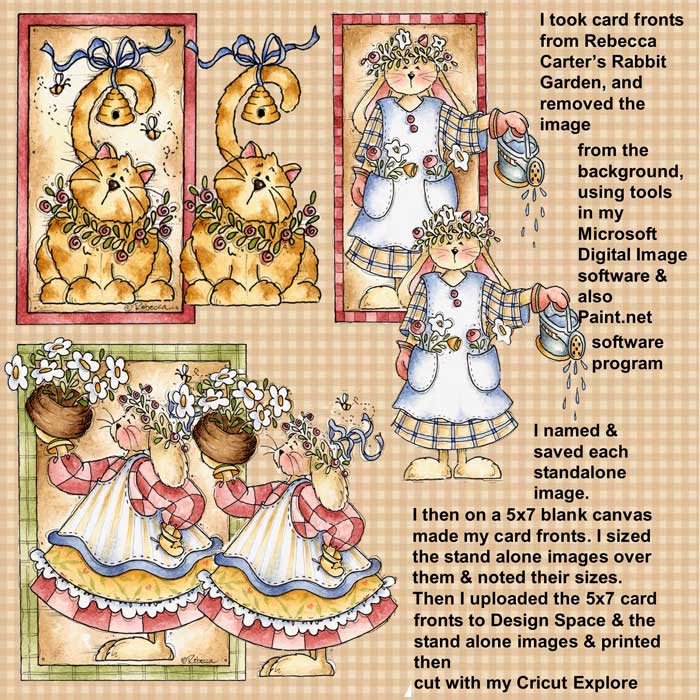
I took 3 card front images from the pccrafter creatable "Rabbit Garden" by Rebecca Carter,
and removed the images/figures from the background.(note: these images are no longer available, pccrafter closed in 2012,
and only a handful of former pccrafter artists are still selling online downloadable clip art sets)
I have a large collection of wonderful clip art that I have bought over the past 15 years, a majority of it coming from the former pccrafter.com website.
The website went out of business in early 2012. I tend to do much of my creating and designing offline using my own software & graphics/clip art,
and then upload the compilations or single images to Design Space to utilize the Print then Cut feature of the Cricut Explore.
Please note: even with pccrafter out of business, all images from pccrafter (or any source or by any artist) still retain the Terms of Use that were agreed to, when installing the graphics to your computers, and artists still retain copyrights. No images extracted can be tubed, or shared, or uploaded to sites, such as Picasa, Pinterest, etc. Please remember to honor all terms of use, angel policies, and the artists copyrights for any/all images you are working with.
Update April 2019 : Where I obtain current Clipart and Digital Sets from in 2019
http://chocolateonthekeyboard.blogspot.com/2017/10/where-i-get-my-clipart-fromcurrent.html
To make these particular cards:
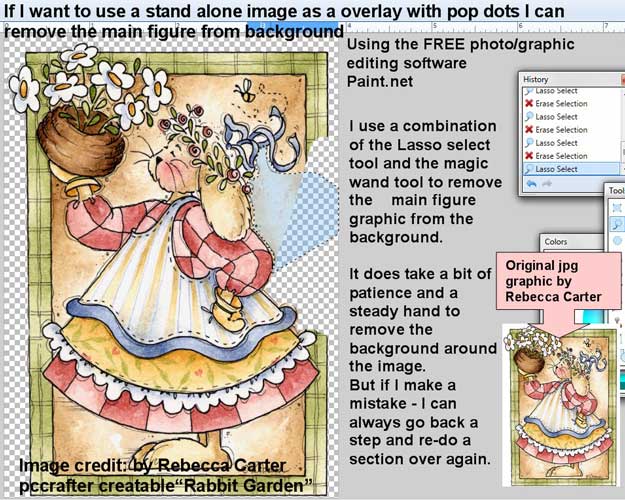
I used a combination of software programs and their tools. Paint.net is a FREE software program that anyone can download >>
Paint.net software program - Free to download **note it is for Windows users, I don't think there is a MAC version (see >> alternatives for Mac owners).
I am actually still learning the program, and use it mostly for removing the white background from JPG graphics/clipart as it does a bit better job than my favorite software program, the discontinued Microsoft Digital Image software program (currently I use MS Digital Image Suite 2006, even though it is discontinued & no longer supported by Microsoft, it can still be found on Ebay)
I made a webpage in 2006 showing how I extracted images from backgrounds using Microsoft Digital Image Pro 10 >>
http://sippingtea.com/hugbees/cutoutpic.html
I am trying to do more things in Paint.net. So for these particular images, I did use the tools in Paint.net, to remove the figures from the background and create standalone images. I wanted the standalone images, to cut with my Cricut Explore, and then use pop-dots to layer them over the 5x7 card fronts I would make using MS Digital Image software program.
Note Updated this page in April 2019 to include links to Online Albums of other Cards I have done since I got my Explore in Oct 2014
The basics of how I remove the digital clipart standalone image from a background I still do pretty much the same as I did in these screen shots from 2015, now in 2019.
The following are some screen shots and notes of the process I used to get the standalone images:
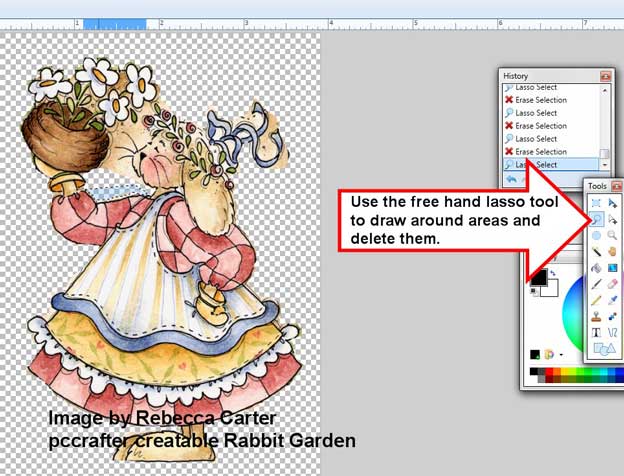
I used the tools in Paint.net of the free hand lasso tool and the magic wand tool. I simply drew around
areas that I wanted removed, and deleted. As I got closer to the edges of the figure,
I did zoom in and as I drew around the edges, I had to take a bit more time.
I knew that some areas I wouldn't need to use for figure such as the whiskers on the rabbit.
I knew that the Cricut Explore could cut fairly fine details, but these whiskers were gonna
be too thin. Rebecca's images have lots of little bits and pieces around the main image
that I also wanted to remove.
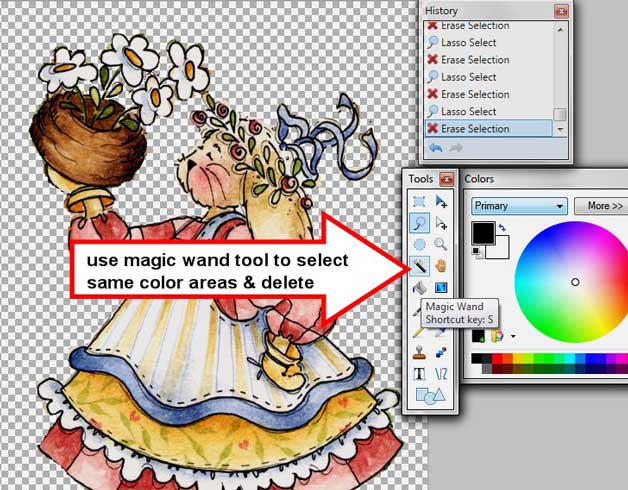
For the shaded beige areas, I used the Magic Wand tool,
I set the Tolerance setting for the Magic Wand tool
at about 10-25
and I can always decrease or increase the tolerance setting to make sure it only selects as much of an
area as I want to remove, once area is selected I just delete it.
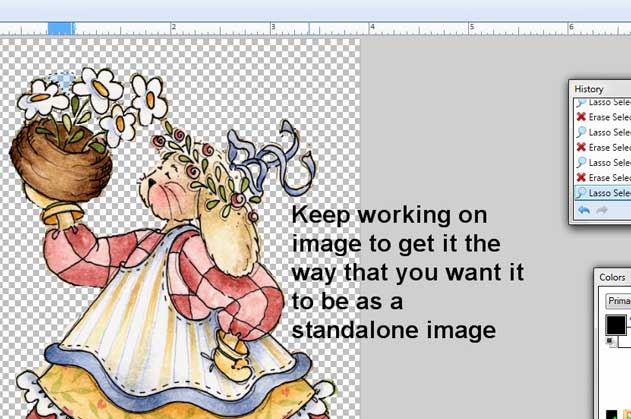
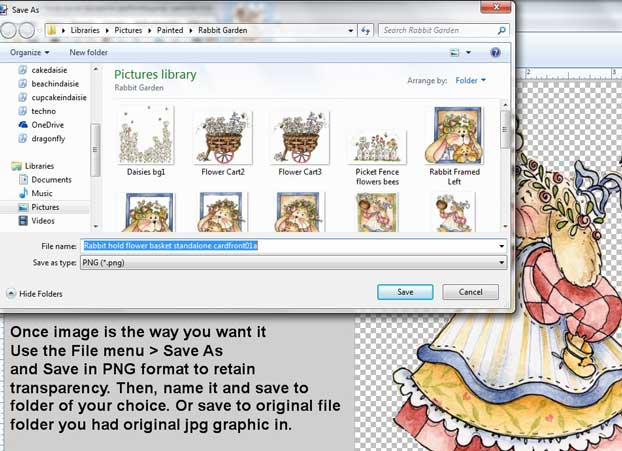
Once I am happy with the image, I name and save it in PNG format to retain its
transparency. I save it to a location I will remember and associate with such images.
Next, I used my Microsoft Digital Image Software program to assemble my card fronts
and size the stand alone images over the card fronts. I want the stand alone image**
to be the same size as it is on the 5x7 card front ,
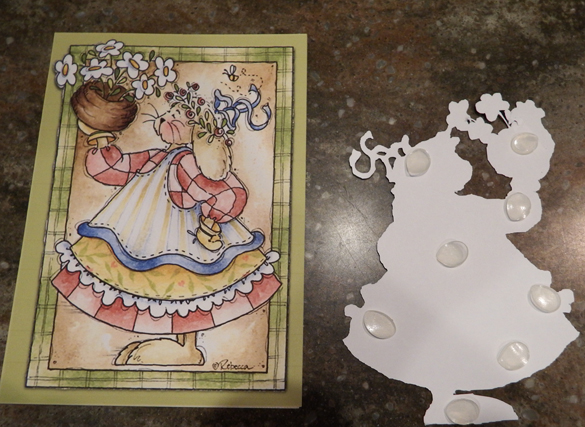
**I will use the standalone image to place pop up glue dots on the back,
so that it stands out on the card front.
I create a new blank canvas in Digital Image, and size it 5x7. I then bring in the
card front images from the Rabbit Garden collection (and each of the stand alone images I made)
I arrange the card front on the 5x7 canvas, and insert a 5x7 blank background, and then
decide on a background fill color and apply any filters or effects to it, using the tools
in MS Digital Image.
Once I am happy with the compilation of the actual 5x7 card front, I name and save it as a jpg image
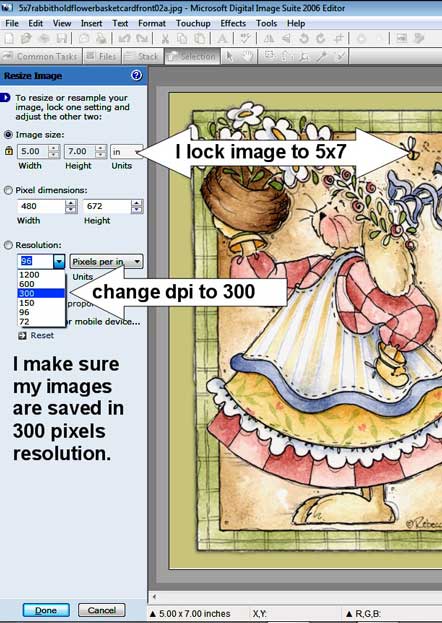
I save the card front itself in 300 dpi
(I don't need to save it in PNG format as it
won't need a transparent background
such as the Standalone image
needs to be. )
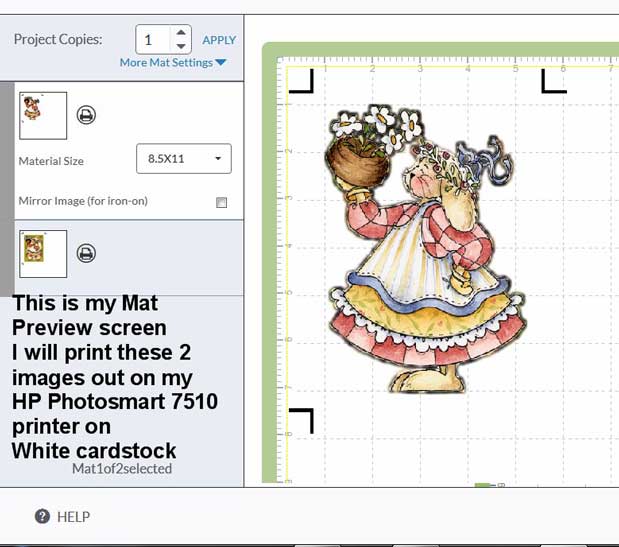
All I want to do when in Design Space
is have the 5x7 image print on my printer, and then
the Cricut Explore cut the 5x7 area.
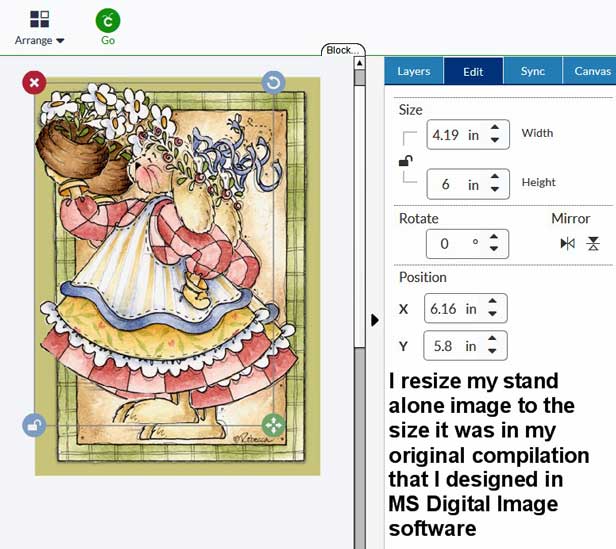
I size the stand alone image over the Card Front, and then copy that image
and paste it into a new document in Digital Image, and it is exactly the size that I need
to make note of the measurements for resizing in Design Space.
I save that particular stand alone image with a new name and to a place
I will remember and associate with such images.
(for example, I would put
the 5x7 card fronts and the stand alone images
in a folder for things,
that I will be cutting with my Cricut Explore -
named 5x7Cards2Cut or something similar)
And then when I wanted to Upload these particular images
to Design Space them from that particular folder.
I use the Upload feature of Cricut Design Space to upload my images and compilations
I can also use the Pattern Upload to upload Patterns like Digital background papers, to use as Fill Patterns on Shapes . All shapes and or images can not be larger than the
Printable Area allowance of currently 6.75 x 9.25 inches (as of April 2019) .
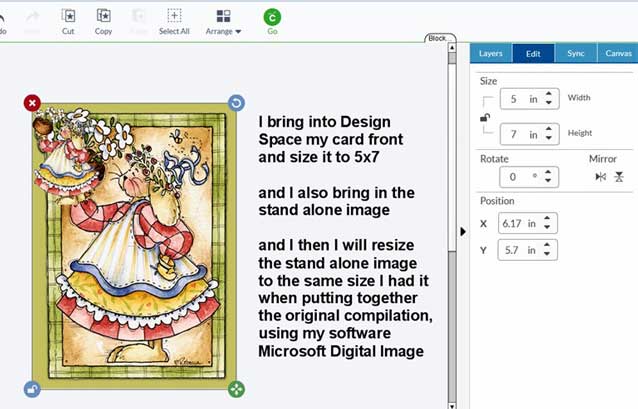
Once I have uploaded the images to Design Space,
when I bring them into the work area canvas,
I will need to resize them to the sizes I noted
for the 5x7 front and the stand alone images
I bring both images in at the same time
and when sized correctly
(*I make sure to save the correctly sized *Project* first),
Then - I press Go
and will be prompted to use
2 mats. I will print both the card front and the
stand alone image on White Cardstock using my
HP Photosmart 7510 printer,
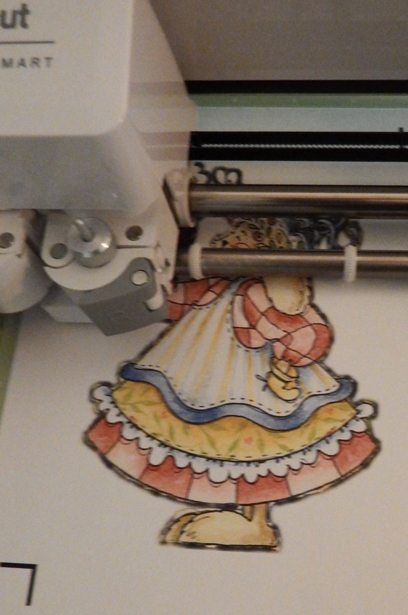
and then place on the Cricut cutting mat
and cut each out. (I have 2 mats, so I just load both images,
and load them one at a time to the Cricut Explore)
**Update, now I use an HP Envy 7640 inkjet printer that I got in summer 2015, and I subscribe to the HP Instant Ink program it qualifies for to save money on ink**
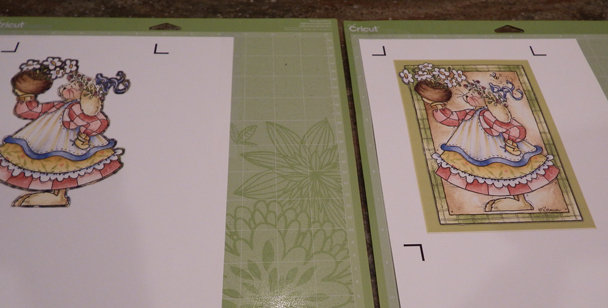
These were printed out on white cardstock using my HP Photosmart 7510 inkjet printer
and then placed on the Cricut cutting mat(s)
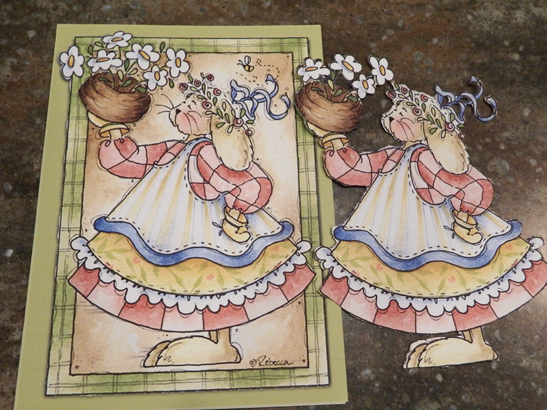
I placed glue pop dots on the back of standalone image and placed on top of card front
I have precut and scored my own 5x7 blank white cardstock cards,
I put a rectangle sized 10 by 7 on the Design Space work canvas (basic shapes are free in Design Space) and attached a free "Score Line" - (also available free in Design Space) at the 5 inch mark on the 10 x 7 rectangle.
I put the Scoring tool in the Cricut Explore - so that my cards were cut and scored at the same time. I did about 20 of these to have handy.
I took these printed card fronts and adhered them to the precut cards with scor-tape.
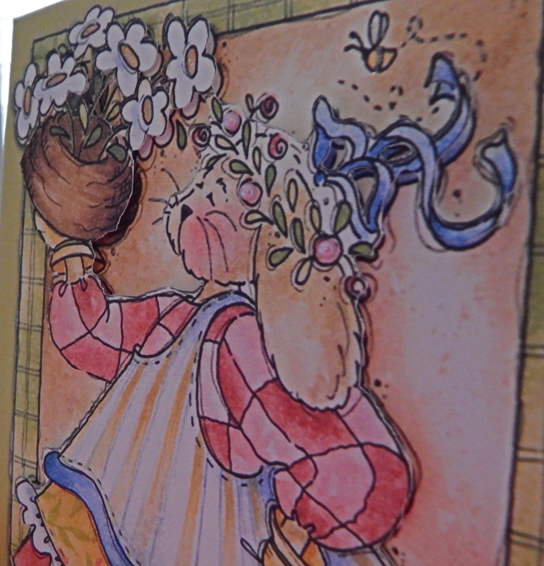
And then I placed the standalone to the front of the card over the figure in the card front.
I finished the fronts with some small embellishments and used a glitter pen on some of the images on the card front and standalone image.
Now I just have to figure out what I am putting inside - these will be
cards going to friends and family, so each one will have its own
personalized text or word art placed inside. I will cut out those words
using the Cricut Explore. They will be separate images with graphics
and text sized made into one single compilation, about 4x6 and
pre-designed using MS Digital Image
and then uploaded to Design Space to cut each one out.
I will adhere to inside of card using scor-tape.
On my blog I also posted a few more photos of cards I have made using this method
http://chocolateonthekeyboard.blogspot.com/2015/04/my-glory-and-other-stuff.html
Update 2019
I have an online Flickr Albums showing some other examples of Cards I have done over the past 4+ years with my Cricut Explore
Cards
https://www.flickr.com/gp/24663470@N06/G6D28g
Some of these photos may be duplicated in the main Cards album
Rose Gatefold Card
https://www.flickr.com/gp/24663470@N06/175r17
3 Gatefold Cards
https://www.flickr.com/gp/24663470@N06/fd1Cab
Joy & Peace cards
https://flic.kr/s/aHsmpXPZEL
More Christmas Cards - may contain duplicates of other photos in other albums
https://flic.kr/s/aHsmpcNpus
Teapot Invitation prototype cards
https://www.flickr.com/gp/24663470@N06/Lp0336
April 2019 Bunny Hugs Cards
https://flic.kr/s/aHsmCFd8Vs
Album that I upload lots of my Cricut Projects - photos may be duplicated in other albums
https://www.flickr.com/gp/24663470@N06/VY1a14
Here are links to my older webpages showing my own experience using the
Print then Cut feature of the Cricut Explore and cutting images from
my clip art stash that I have on my computers.
http://sippingtea.com/tuts/cricutexploreprintncut.html
http://sippingtea.com/tuts/cricutexploreprintncut2.html
http://sippingtea.com/tuts/cricutexploreprintncut3.html