Creating Place Cards using the Top
College font in Design Space and Cutting with the
Cricut Explore
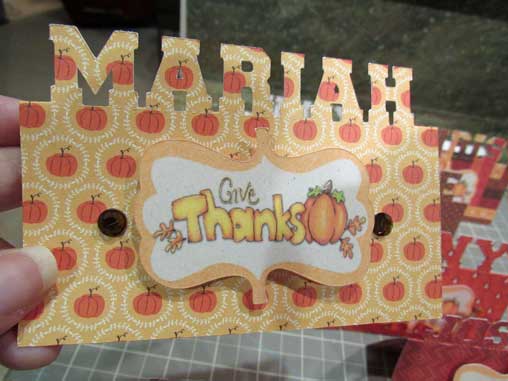

I first made a small template in an offline software program, sizing it to 4x4 and putting a line on it, so that I have a guide to place the text of the names I wanted on the place cards. I uploaded the template to Design Space and named and saved it as a project in my Design Space projects files. When wanting to create a new set of place cards. I opened that template project and duplicated it 8 times for the number of place cards I need for my Family Thanksgiving place settings.
I could have created a similar item in Design Space by placing a shape and sizing it to 4x4 and putting a scoreline in the middle to use as a guide to place the text on it.
Using the Top College font by Kay Hall - produces a font that will cut all the way around 3 sides of the font, and when folded over in half, the Text will "Stand Up", using that portion to show the name. The Top College font is the only one that I am currently aware of that produces this effect for cutting.
Find out more information about the Font and Download and Install to your system fonts.
A new free font for stand up lettering
byhttp://cleversomeday.com/topcollege/
related >>
ScrappyDew Live - Fontastic Fun - with Kay Hall - Jan 15th 2015
https://www.youtube.com/watch?v=LyHNrzQiNgM
Once you have the font installed, you can begin the project. Note sometimes when installing a new font to your computer,
you may need to log out of Design Space if you are logged in, and then log back in again.
Design Space needs to be refreshed anytime you add something new to your computer system such as a Font.
Then once in Design Space, create your shape for the place card, and you can make yours any size.
I am making mine 4x4 and will fold over on the 2inch mark.
For each place card, insert a text box, type out the name you want, and in the Edit menu, choose "System Fonts"
and scroll till you find "Top College" and the text will change to the Top College font.
Place the name on your square and adjust the size to fit on the square and then place on the score line or the line in a premade template.
Once it is done the way you want it, Select ALL and "Attach" -
make sure the layers you want Cut have the Cut icon next to those layers.
Continue making squares, and adding the text, placing on the square,
attaching all, and making sure the name and square are set to cut.
Below are some screen shots showing my own process for how I created my place cards
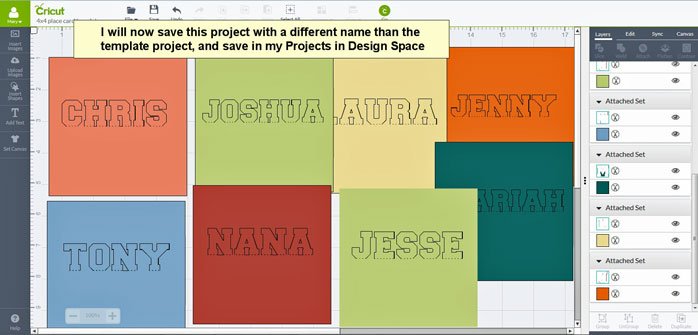
I have made duplicates of the template that I made, for each place card that I will be needing.
I use the Insert Text box, type out the name I want. I open the Edit menu, choose System Fonts,
and locate the "Top College" font and the name changes to that font.
Note: the font looks identical using caps or lower case.
The UPPERcase will produce a score line of its own, the lower case will not have the score line.
In my template I have a line at the 2 inch mark that I use as a guide for placing the text on.
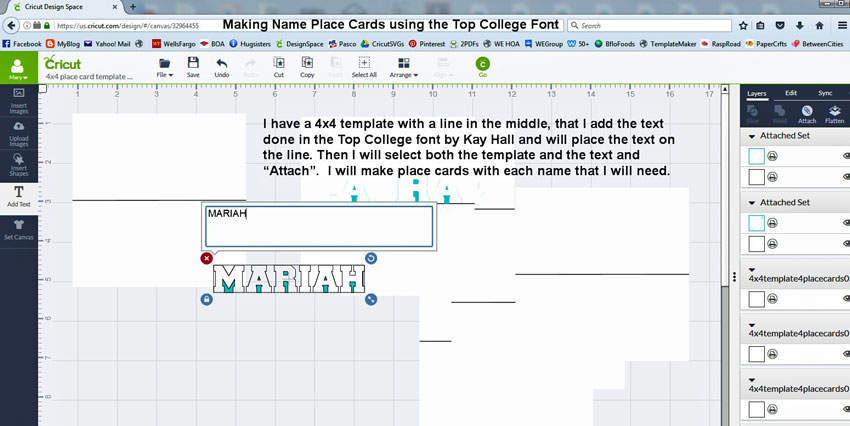
I continue by inserting a new text box for each name and place the names on each duplicate of the template
when I am happy with the template with the name on it, I select the 2 objects and "Attach"
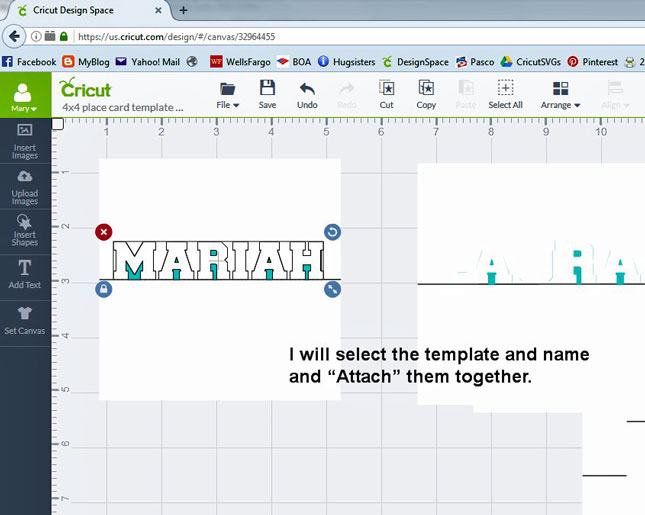
Because I used an uploaded template that I made, Design Space is treating it as a Print then Cut Item,
have to make sure that the items in each attached set that I want Cut
that I change the icon to a Cut icon next to each layer in the set that needs to be cut

I for this example have changed the color for the template and the text to colors that will allow me to know which is which
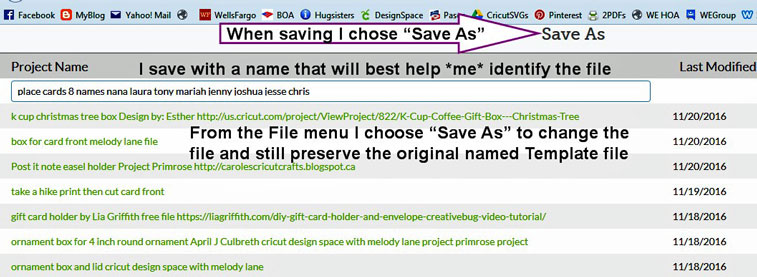
I will save this different color place cards project using the File > Save As option. Then when I want to cut any of these cards,
I can choose which ones or all of them that I want to cut, to select only specific ones, I would just cross out the eyes next to the
attached set layers, and leave the ones I wanted to cut.
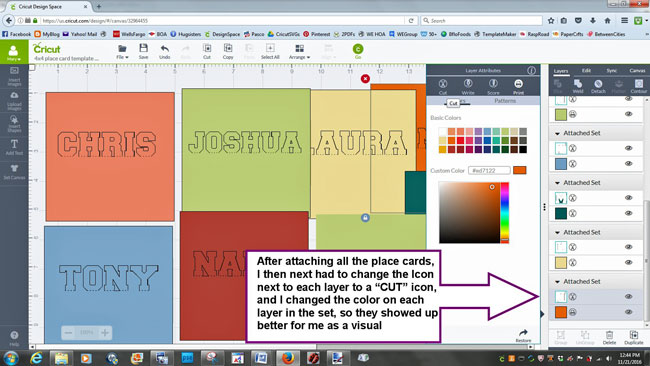
Before saving I make sure that all layers in the attached sets are set to "Cut"
I use the File >> Save As option to name and save my projects to something that I will help me identify each project
Note: when the new Design Space 3 is finally released hopefully before the end of 2016, one of the new features will be
that when you look through your projects you will see a thumbnail image of it. It will be an excellent improvement over the current
Design Space program.
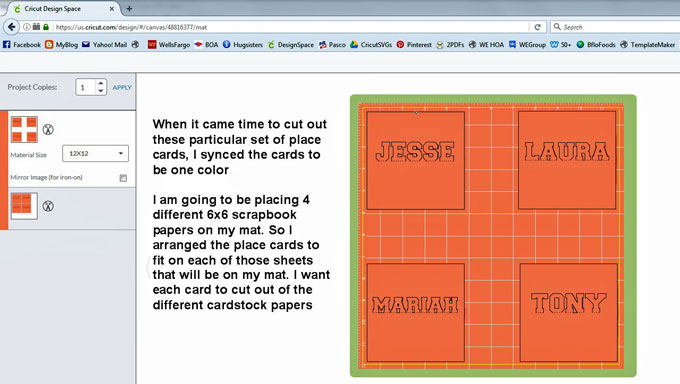
Next I have decided to place 4 place cards on 4 different 6x6 pieces of scrapbook cardstock papers.
I will arrange the 6x6 pieces on my Cricut Mat. So to get 4 to the mat, I will need to "SNYC" all of the different color placecard to a single color -
for my own purposes it doesn't matter which color I choose to snyc them all to, as I am cutting on different pattern papers.
If I just wanted to cut one at a time I could just choose which one I wanted to cut and place the paper for just that one image.
If I wanted to print multiples on a single card stock pattern or color - I would still use the "Synced" images
**Note too, I saved the "synced" images as a new project using the File > Save As and named it differently that the project with the different colors
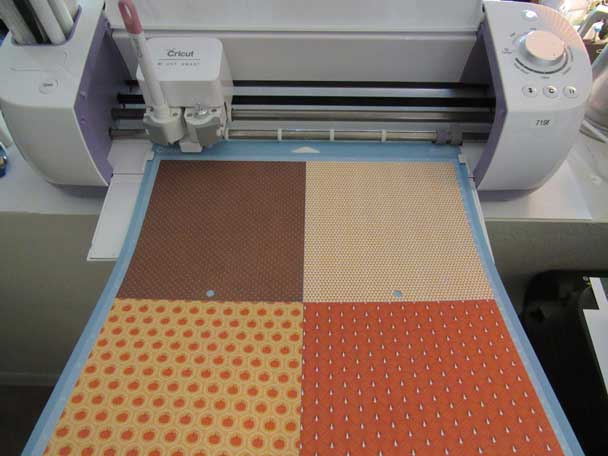
I placed the 4 different 6x6 patterned cardstock paper on my Cricut cutting to cut out the 4 place cards
I will do this a second time with another set of 4 patterned 6x6 cardstock papers to complete 8 place cards.
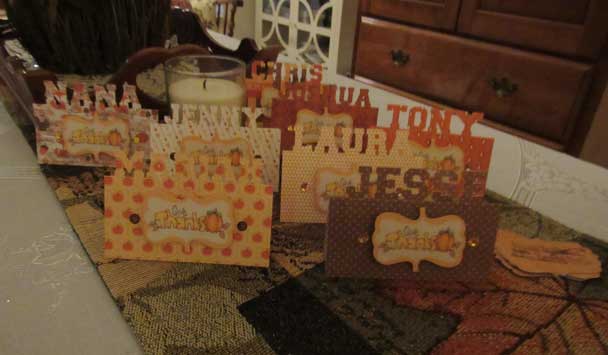
After cutting I take each cut card and fold over in half - the text will stand up in the middle crease.
I use my bone folder to crease the fold
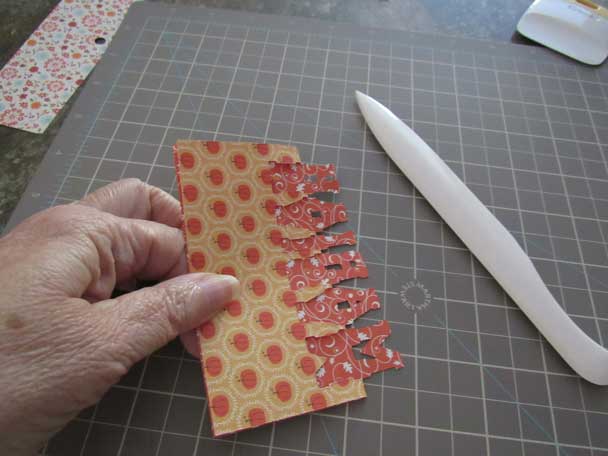
I proceed to cut and fold the 8 place cards I am making
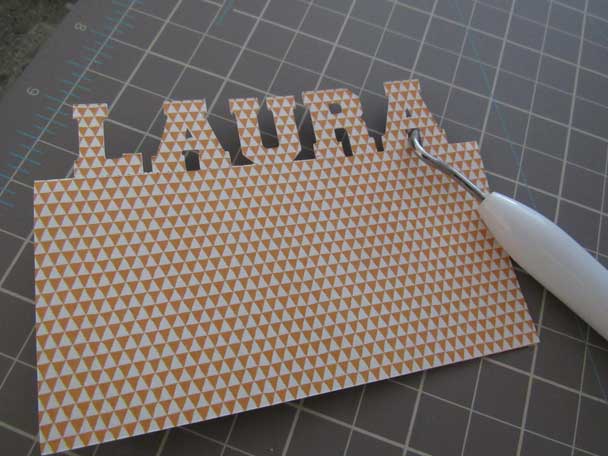
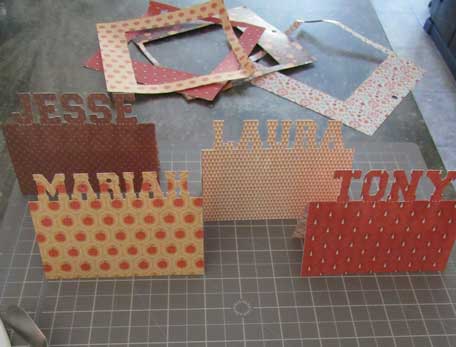
After cutting all 8 cards, I print then cut some label/tags that I had created offline
using my favorite software program - the Discontinued software
Microsoft Digital Image Suite 2006. Note it is still available for sale on Ebay
but is no longer made or supported by Microsoft. For my purposes of compiling
images for uploading to Design Space to use the Print then Cut feature
I find MS Digital Image a very user friendly program.
I uploaded the tags to Design Space, sized them and then applied 8 to the number
I wanted and was able to get all 8 on one 8x11.5 sheet of white cardstock for printing
and cutting. Note: I use an HP Envy 7640 printer for printing any compilations/images
of clip art I am going to use for the Print then Cut feature and upload to Design Space.
I will apply the tags to the front of the place cards with 3d taped pads for
dimension
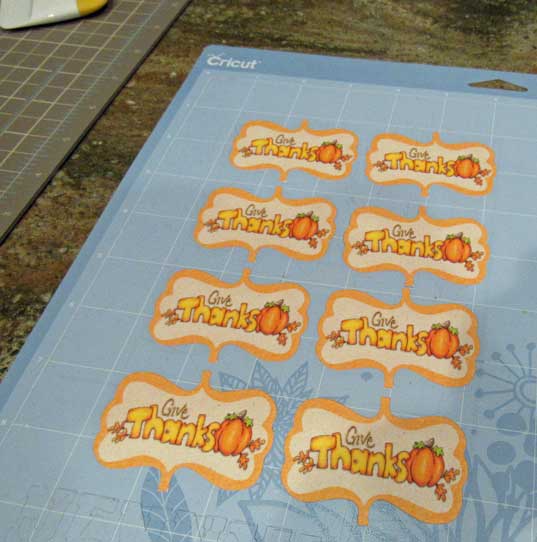
and add a wee bit of bling
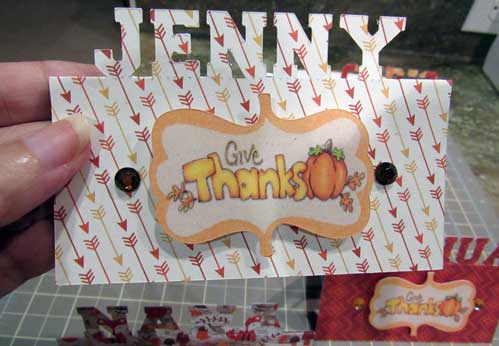
Taa-Daa - All done and ready for my Thanksgiving Table 2016
I have also made webpages showing my own experience with the Print then Cut feature
these pages were created when I first got my Cricut Explore in October 2014.
So the screen shots and some information may be outdated as Design Space has updated
2 times since I made the webpages. Design Space 3 will probably be released by the end of
2016. But the Basics of the Print then Cut feature should not be really all that different in
the new version of Design Space.
Cricut Explore Print then Cut - my own experience
http://sippingtea.com/tuts/cricutexploreprintncut.html
http://sippingtea.com/tuts/cricutexploreprintncut2.html
http://sippingtea.com/tuts/cricutexploreprintncut3.html
New page created 2016 >> How I Printed and Cut elements/images from a Digital Scrapbook Kit
http://sippingtea.com/tuts/printncutdigielements.html
See some of the Cards I have made - in this blog post
http://chocolateonthekeyboard.blogspot.com/2015/04/my-glory-and-other-stuff.html